
Welcome to the TLR tutorial on CV Axle (constant velocity axle) rebuild. Our aim is to help you understand the basics of a CV axle and how to rebuild one, and hopefully help you feel comfortable with the maintenance of your own. CV maintenance is very important, not only for older cars such a Class 11 race car, but newer cars as well. If the boot is allowed to split and debris to infiltrate into your bearings, your CV axle will eventually have wear/dry spots and cause a lot more problems than you want. If they start to fail they will cause undue stress and damage on your transmission (including back and forth movement that slams the axle to your transmission), and if they do fail you will obviously no longer have power distribution to your wheels. As you can see, CV axle maintenance is surprisingly easy, and very important. For the most part, CV axles are pretty similar in most cases. It’s a basic concept.
For this tutorial, we will be using the inside joint of a 1986 VW Vanagon Syncro, the part that connects to the transmission (the inside). I chose this particular axle for a model because A. both joints on a VW Bug (Class 11) axle are the same on both sides, and B. I had to rebuild these anyway because our Vanagon has 320,000 miles on it, so it becomes a photo example. I also have used a 1964 VW Variant Squareback Type 3, because I simply had better photos of that rebuild.
Tools you will use:
- Snap ring pliers
- Bench vise to secure your axle shaft
- 27mm socket
- Hammer
- Flat punch
- A lot of throwaway towels, or a roll of blue lint-free paper towels (a parts washer if you have one is great)
- Tight-fitting gloves, like the Diamond latex ones
- One box, possibly two (one for clean parts, one for dirty parts)
- One small flathead screwdriver (small enough to wedge under a snap ring, and also clean the bolt head out)
- One medium flathead screwdriver
- Flat razor
- Scraper
- Wire brush
- Pliers large enough to squeeze a snap ring
- CV boot kit per each end you are rebuilding. This should include a boot with a flange on it, and usually new CV bolts with washers, and CV grease. We prefer the graphite German brands such as Febi or Bilstein. You should already have lock plates, but you’ll need three to each side as well
- Electric or pneumatic die-grinder (possibly). This would go with a sanding bit and a cylinder head porting bit
- Press or straight jaw-puller (possibly)
When rebuilding an axle, you might have an obvious reason to rebuild it, such as this Vanagon that had a cage that completely blew apart. So, I knew I need a new cage. You will need to determine which size the balls/cage/races are if you need new parts (I used parts we already had from previous CV axle rebuilds/replacements/spare parts). Original German material is always best, especially with the older models. For reference, there are three CV ball bearing sizes for these older VWs. I call them small, medium, and large, you can understand why. This particular Vanagon sports the medium size, the Squareback (T3) had the small ones. I have to apologize in advance – our camera just doesn’t do close-ups. We hope to change that in the near future. For now, we hope this will give a general idea and as always, you are welcome to contact us or post for further questions. Click on the photos for a larger view.

This is a CV axle. According to Wikipedia:
Constant-velocity joints (aka homokinetic or CV joints) allow a drive shaft to transmit power through a variable angle, at constant rotational speed, without an appreciable increase in friction or play. They are mainly used in front wheel drive and all wheel drive cars. Rear wheel drivecars with independent rear suspension typically use CV joints at the ends of the rear axle halfshafts, and increasingly use them on the propshafts. Constant-velocity joints are protected by a rubber boot, a CV gaiter. Cracks and splits in the boot will allow contaminants in, which would cause the joint to wear quickly.
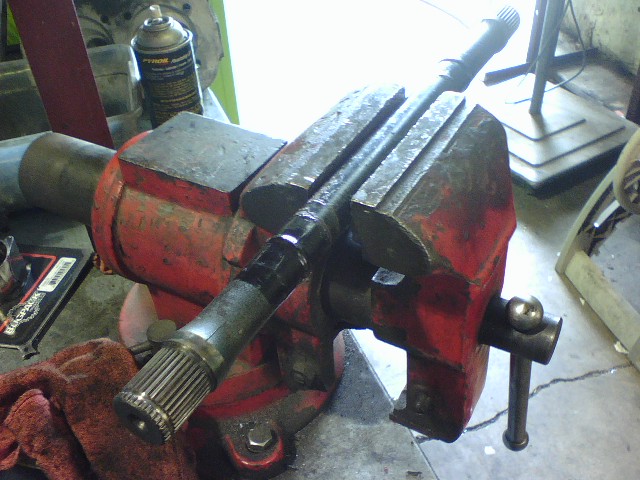
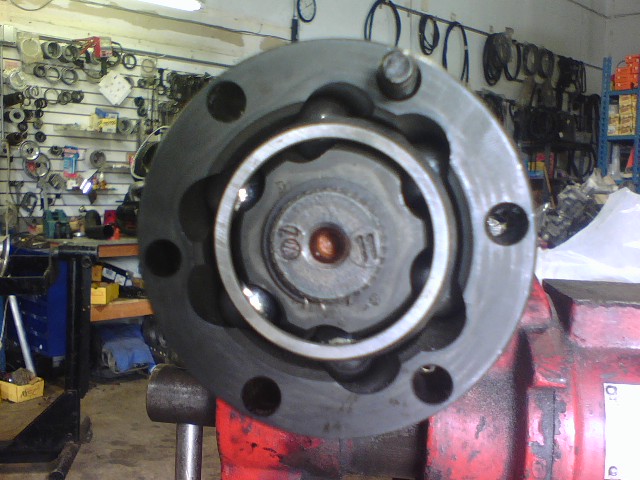
One side attaches to the transmission and one side attaches to the stub axle, and if you are working on an older VW that is in the rear of the car. It’s very important that the ball bearings inside the axle joint stay lubed with grease, and that it remain protected for the duration of its life (by the rubber boot, presumably). We will start by assuming you have already removed the axle from the car. If you have problems initially with this, you can scrape the build-up of debris from the inside of the bolts (usually star or hex pattern), tap the bit into the bolt with a hammer, and use an impact gun to remove it. If that doesn’t work, you can use a punch to create a “dent” in the bolt itself with a hammer, and use that hammer to break loose the bolt by continuing to force it to turn in the direction you need to. Don’t forget that spray-lube is your friend. Most importantly: righty tighty, lefty loosey. Anyway, if you have removed it and have pressed it into a vise, like the photo above, then you will need some snap-ring pliers:

Sometimes these snap rings like you to make you work for it. Use a tiny flat-head screwdriver to work it under the ring and hold it in place while using the pliers at the same time. This really ends up becoming a perfected art, and if you have a difficult set of CV axles, you will perfect it. Good news, right? Once you remove the snap ring pliers, you will have the CV joint to remove. This can be easy or difficult, I find them to be easier the more mileage the CV has. Sometimes you get lucky and slide them off. Sometimes you will need to either A. have a press that you can set the CV axle into and press apart the shaft from the joint or B. have a two jaw puller to help you. I used something like THIS and it wasn’t too expensive. What you have that will work is what you have though. As long as you don’t ruin it while getting the joint off of there. Sometimes you can get really lucky and break it loose with a punch and a hammer gently on the backside, even. I also might point out now that you will want to pay attention to how your joint is situated. It does matter. Generally, the “line” on the outside of the outer race will be facing the outside of the shaft, towards the stub axle. The “flat” and not line-textured side of the inner race and cage will be facing the inside of the axle, towards the tranny. Just pay attention, and try to keep them all in order as you remove them. I like to use a card-board box, and will write notes inside the box as I remove parts so I remind myself. When I am done cleaning the parts, I place them inside the box exactly as they were removed, and according to my written notes. If you want my honesty, I find that Sierra Nevada beer boxes for the 24 pack of bottles works just perfect for this job. 🙂 It’s the right size, and it’s recycling. I also mark the shaft itself with white-out or a paint pen with arrows and acronyms. I for inner, O for outer, and arrows facing whatever way I need it to. Depending on which car (like the Green Booger) I also mark it D or P – driver or passenger side so I even know which side it belongs to on the car. I suppose I’m particular in that way, but why mess with what has worked well for us?
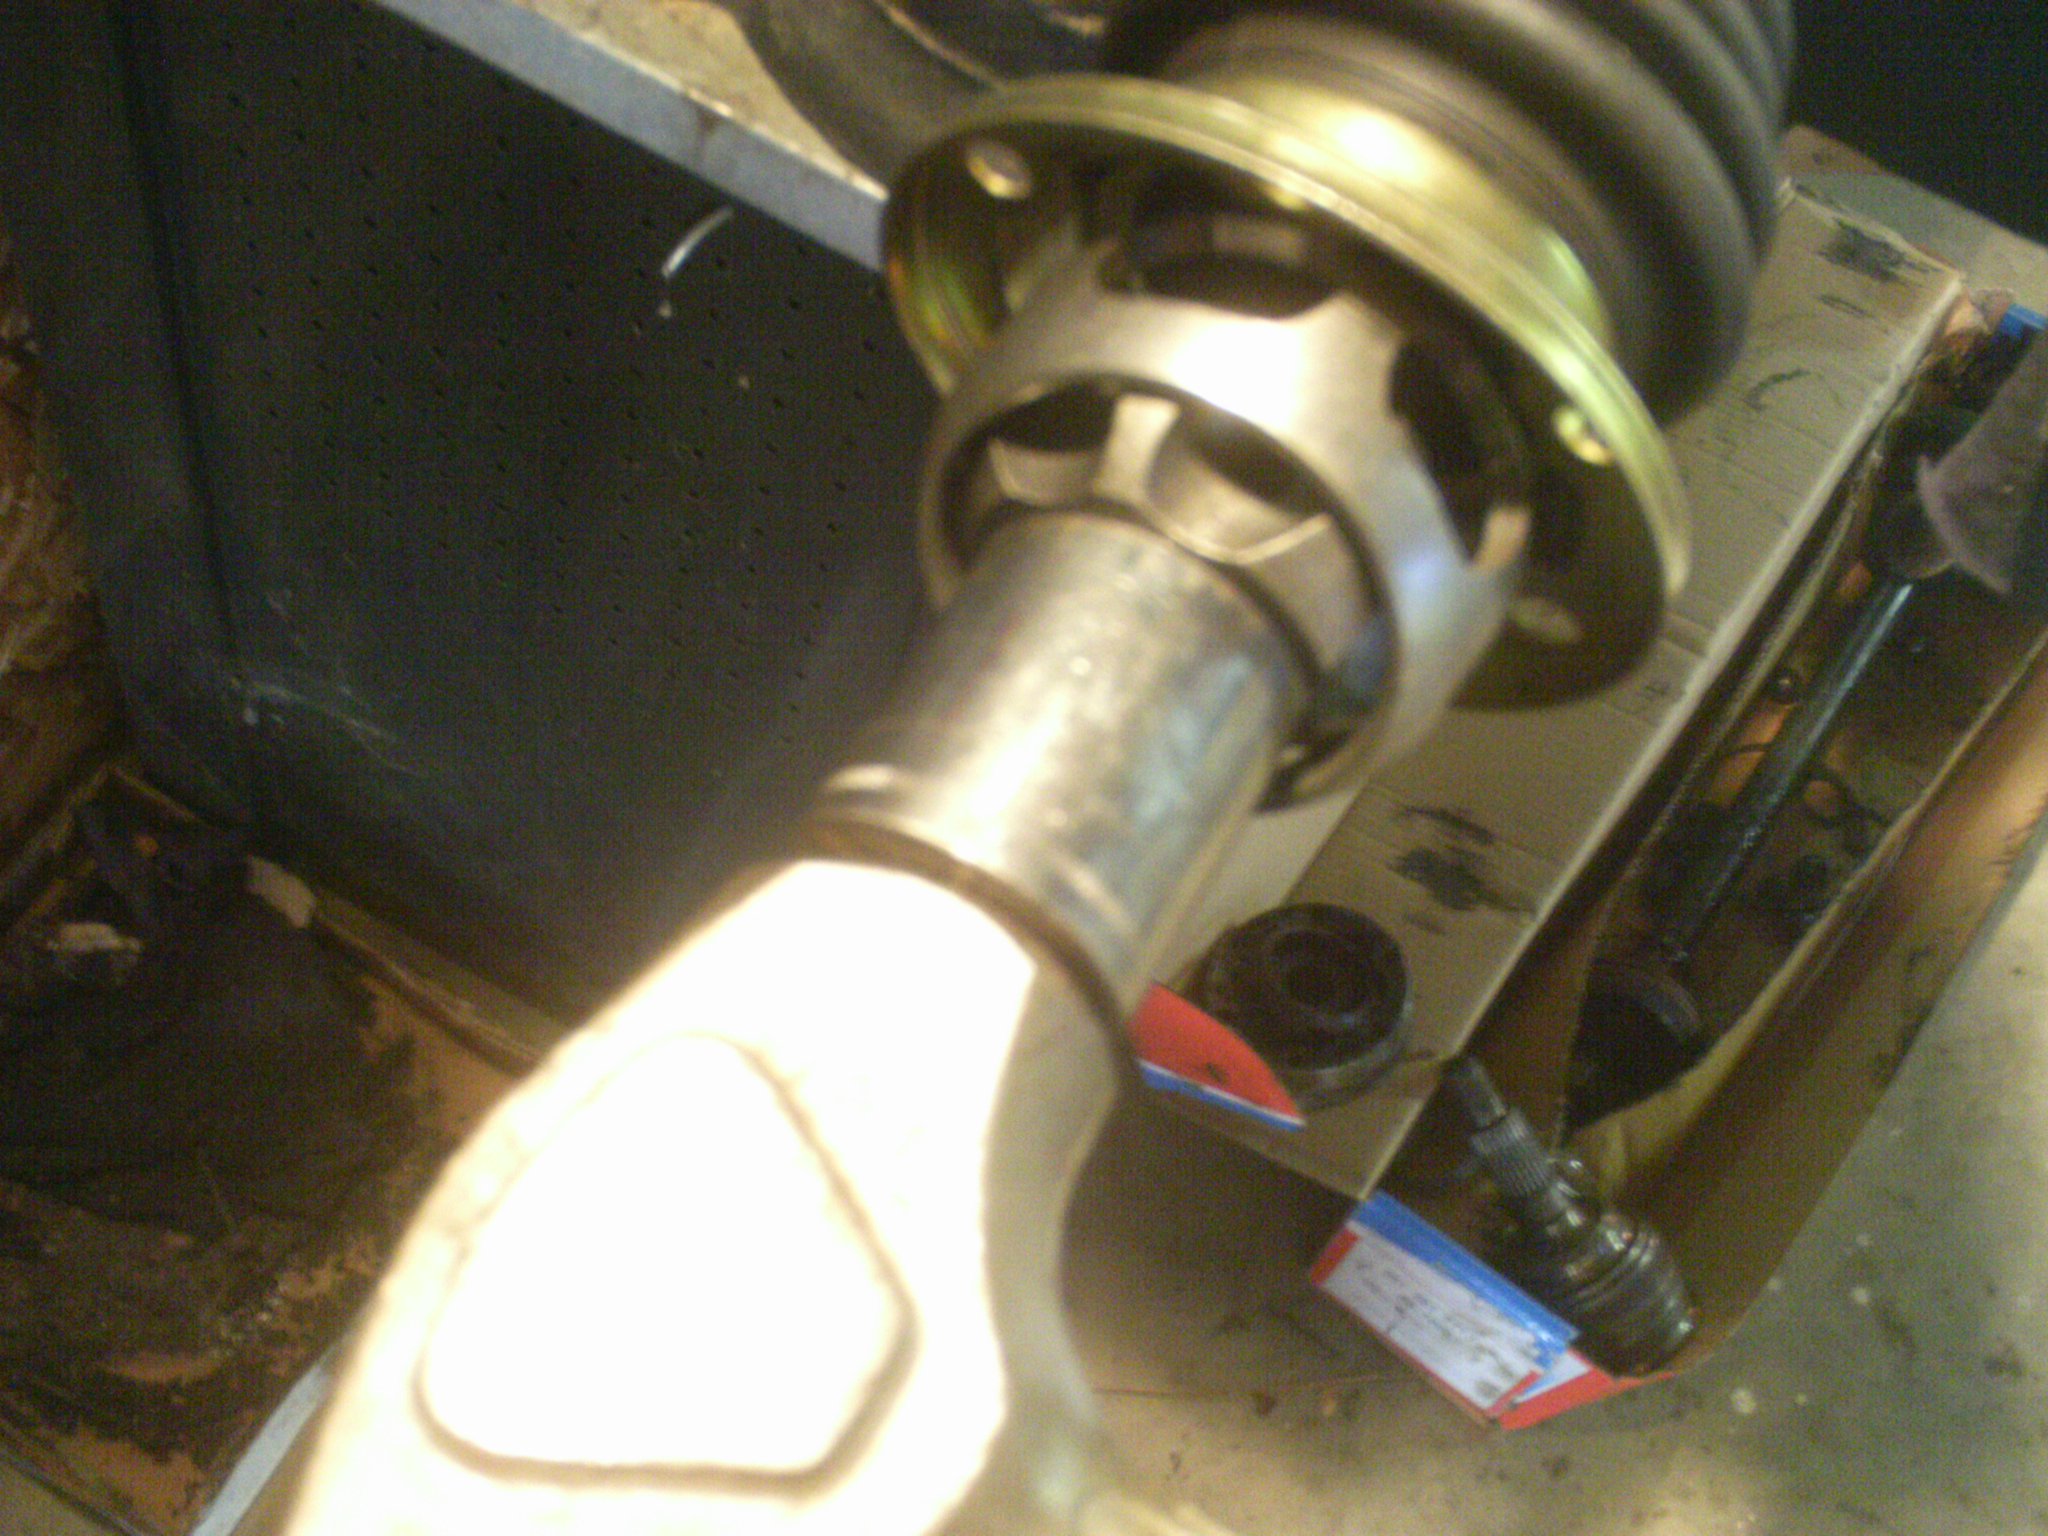
Now you will need to separate the boot from the outer race. This is usually easy, but sometimes you will need to use a punch against the boot flange and hit that with a hammer at intervals around the diameter of the boot. It will eventually pop it off, I promise. Slide the boot off the shaft and throw it away if you won’t be reusing it. I generally don’t.
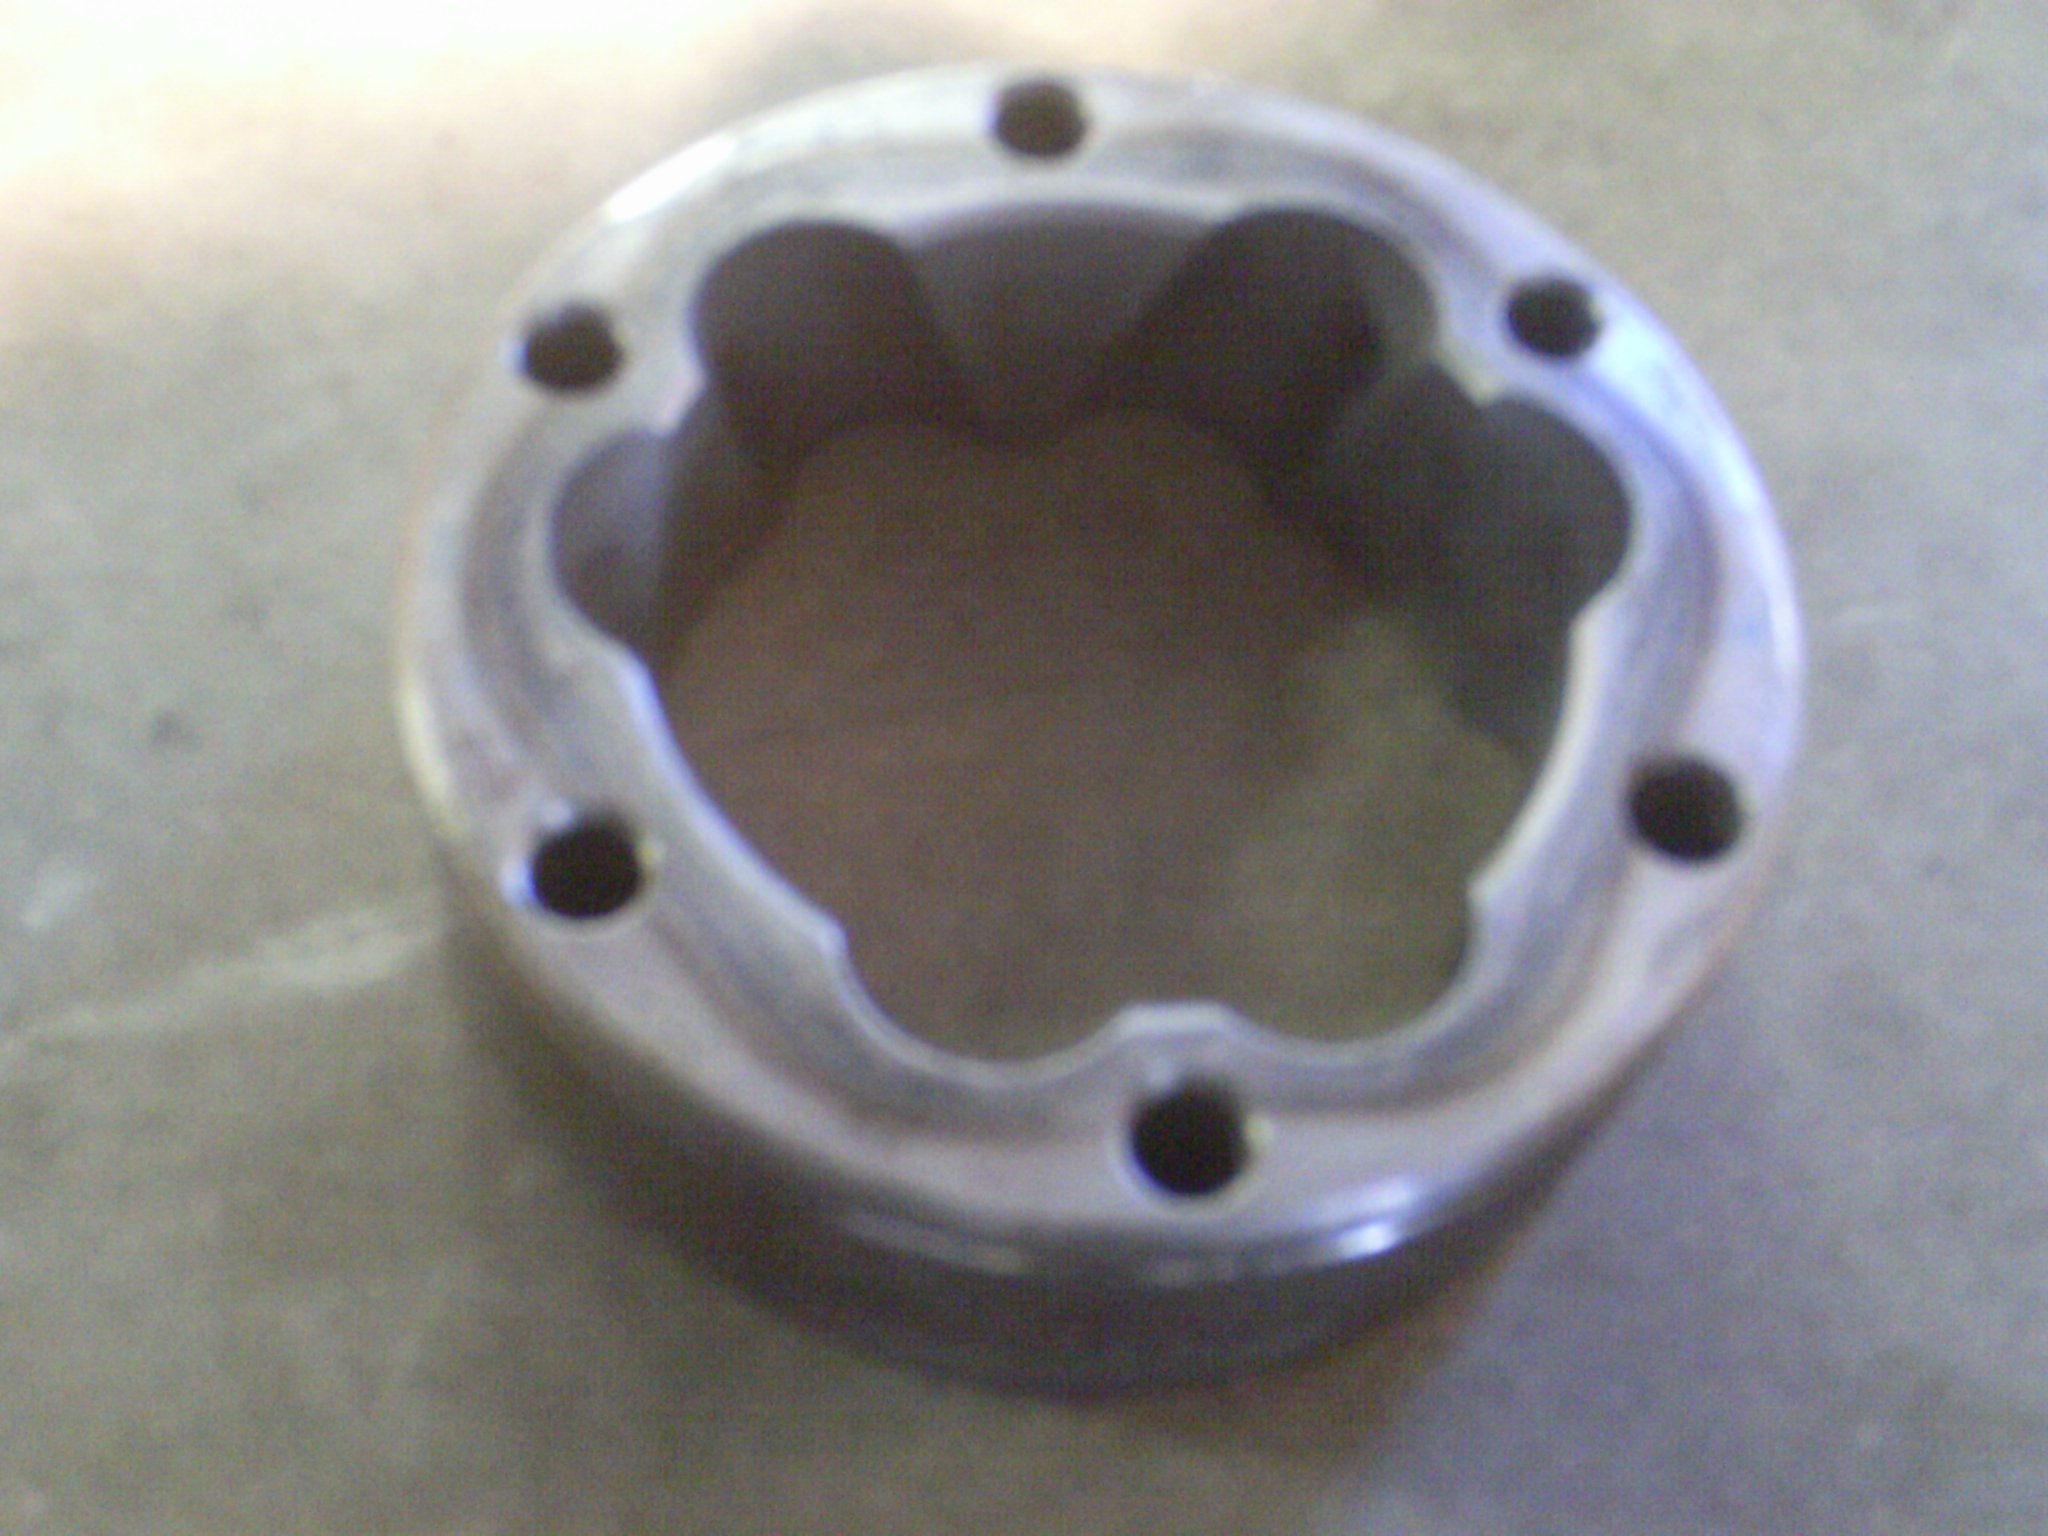
So once you get the joint off, you will find there are basically four parts to it, one of the most obvious are the ball bearings. I did not picture them here because they are obvious, and there are six of them. Please also note that there is usually a larger washer on the inside (towards the tranny) of the inner race as well, though we do not use them in an off-road car as it promotes more range of movement on the axle shaft. So those have not been pictured. We also do not use the strap clamps that sometimes come with boots. Here is what is incorporated:


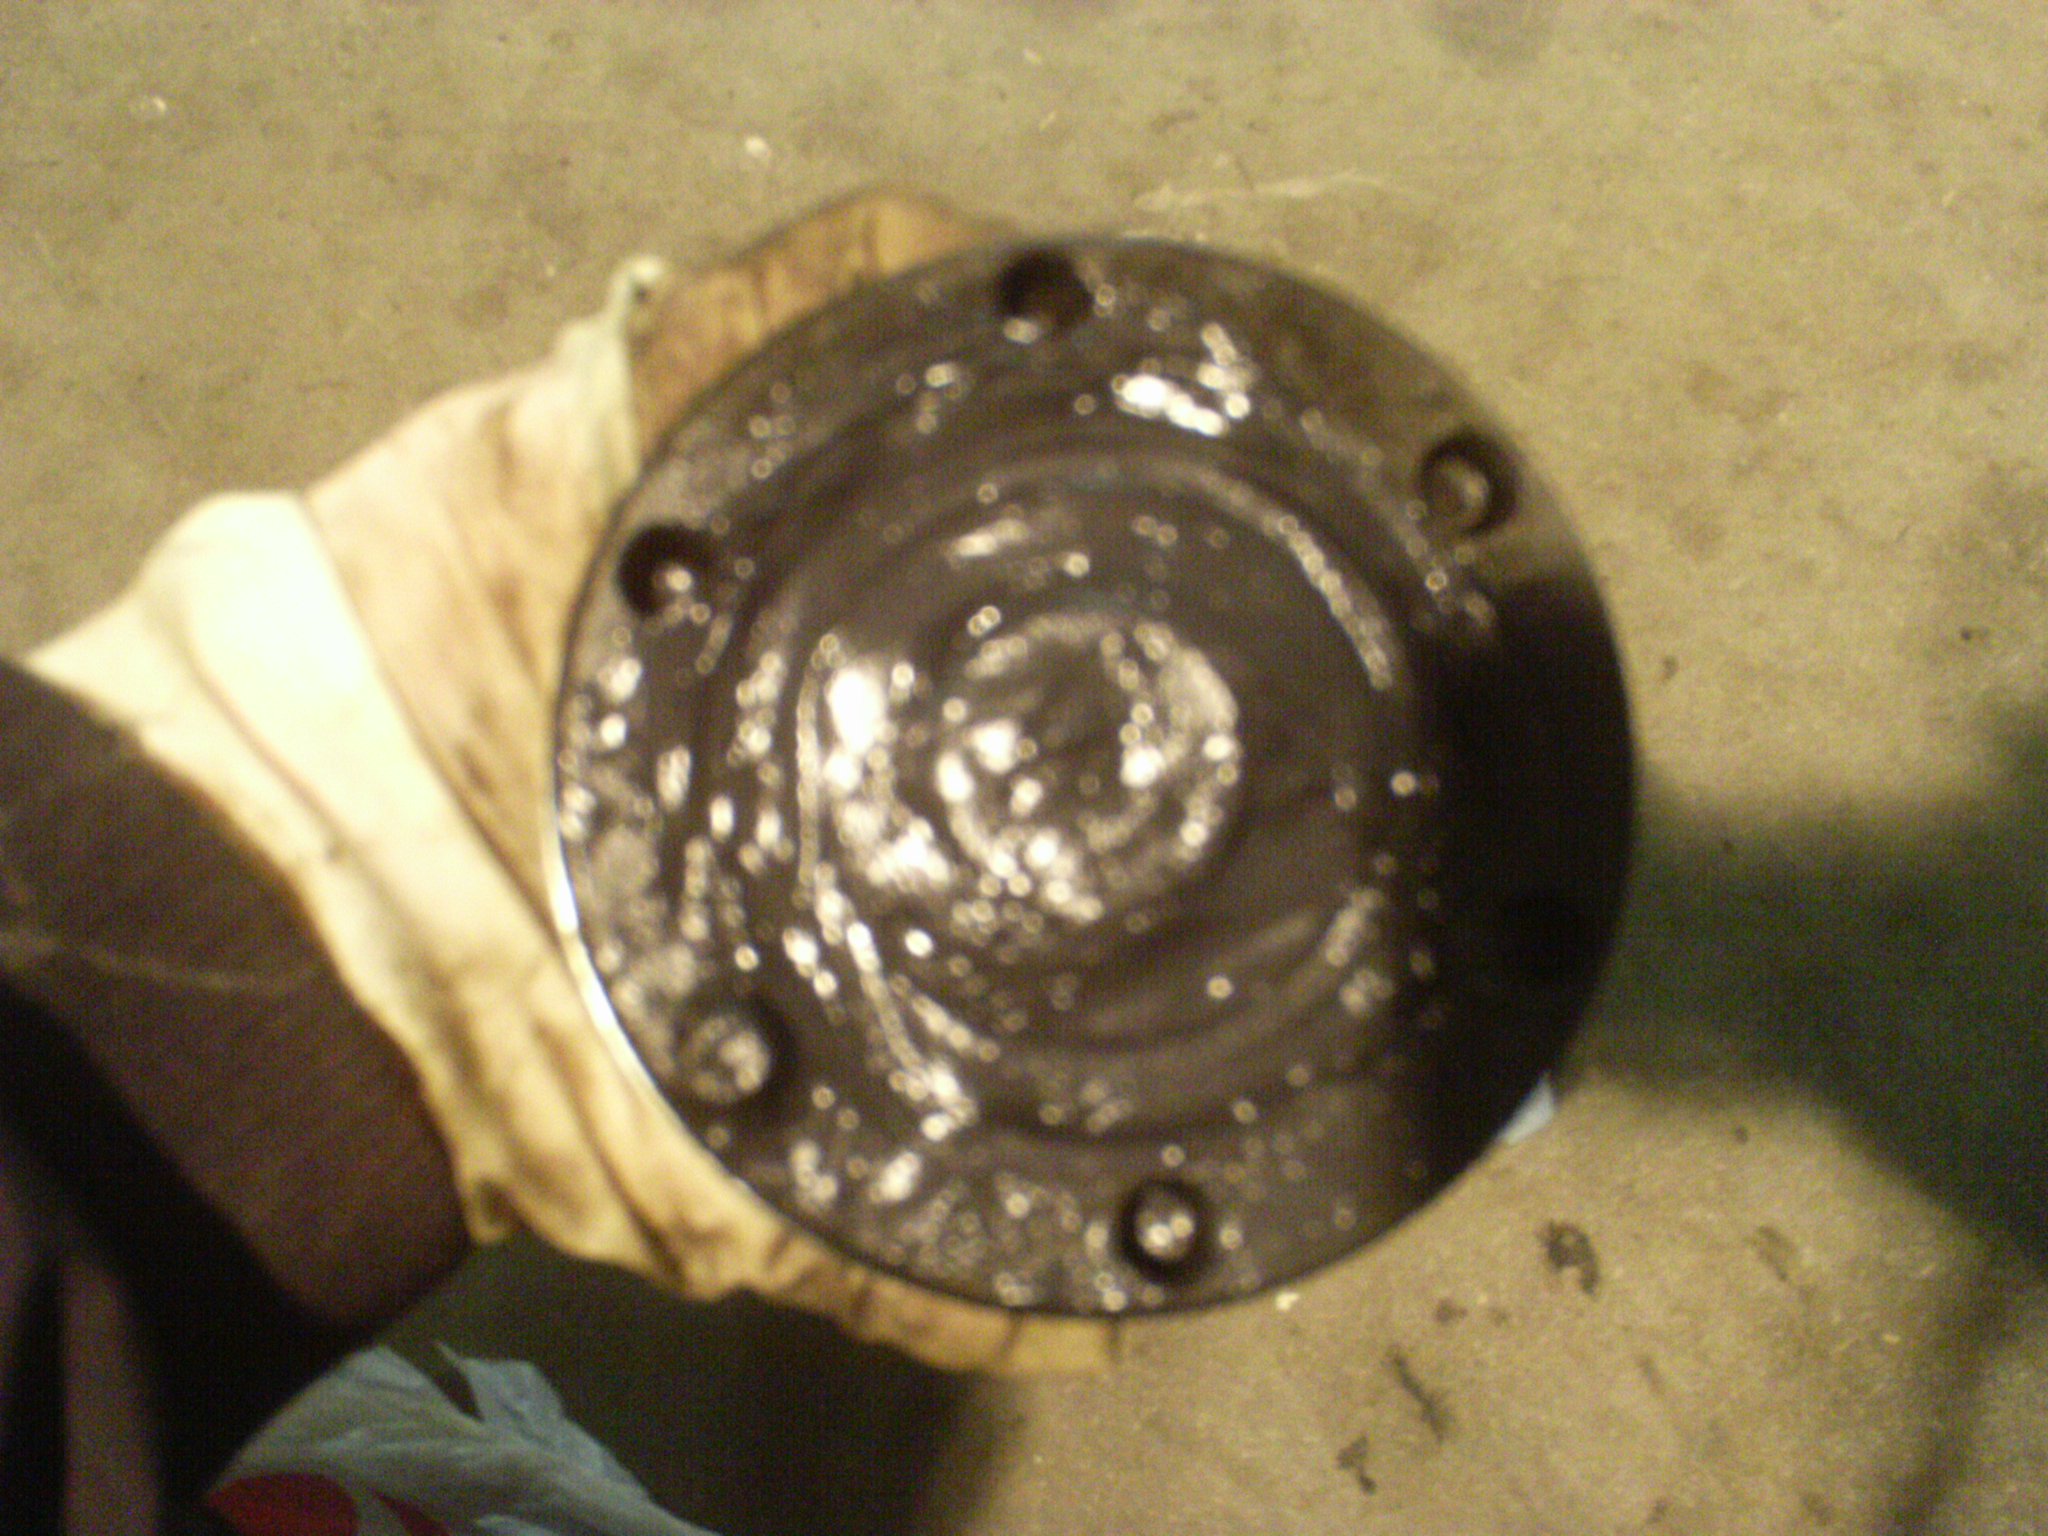
You will find that each of these parts will generally be nasty. They will be covered in old grease and presumably dirt and oil. If you aren’t lucky enough to have a parts washer, the best thing to clean that awful CV grease is A. clothes you don’t care about, and B. either shop towels (like the red throwaway ones) or the blue non-lint paper towels you can purchase at auto-parts stores (like O/Reilly’s). USE GLOVES, this is a nasty job from start to end. Tight fitting latex or similar gloves are best. You will want to run a flat razor or scraper on the outside of the outer race to clean off that old build-up of dirt, road debris, and oil. I will reiterate that you don’t want to use anything that will leave lint or pieces behind because you do not want debris left in your joint parts after you have rebuilt them. That is bad, and might cause pits later. Once you have them clean (including each ball bearings), inspect them for pits, cracks, over-heating, etc. Cracks and breaks render them useless – you will need replacement parts. Some pits can be polished out:

I use an pneumatic powered die-grinder, though electric will work fine too. Our 18V battery powered drill just didn’t have it, so air or electric is best. Be aware that working in one spot too long will heat up that spot and while I realize this IS a CV part and obviously under some heat pressure…it will burn your hands. So, change it up and come back to a spot repeatedly if necessary. Some pits are just not worth it, in which you will need to find a replacement part. If you are going to have to grind away so much that the ball bearing won’t fit properly anymore, then it’s not good. Make sure you keep it even as you sand away, too. They are oh-so-pretty when you have polished them correctly. Be sure to inspect the ball bearings as well. They should be smooth and round.


So after you clean the shaft as well, you will be ready to assemble your axle again. You will start with the boot, which presumably you have purchased new ones that are right for your car. 251 598 201 is the correct part number for 1968-1992 type 2 axles, which are commonly used on Class 11’s. You can use your thumbs from the inside to press the boot up and on the shaft. Once you get it there, you sometimes need other tools to help you get it off the threads and where you need it to be. I use a medium length flat head screwdriver between the boot and the shaft, then work it around and upwards until I get it past the threads and can manually force it to where it needs to go:

Once your boot is in place, you can put your inner race together with the cage and press it onto the shaft, making sure you lined up the threads. Some people prefer to put the entire joint back together OFF of the shaft and then press everything back on rebuilt. For my personal ease, I choose not to…it just works for me better to do it all individually while the parts on actually on the CV shaft. So whatever works better for you – it’s up to you. Either way, be sure you have the correct side facing out (usually the side that has a sort of line pattern instead of the slightly pitted or flat pattern). Be sure it is clean of debris of any kind. Sometimes the inner race will slide back on with ease, like the Green Booger’s does. Some do not, like the Synchro or the the T3. In this case, you will need to have a socket that will fit over the shaft but is not too large to oversize the inner race. Then tap the race back on with a hammer (on the socket, not the race), checking your progress every other smack. I mean check it too, because if you go too far and you’re already having to tap it back on, that means you’ll have to use your press to pull it back to where you want it. Keep your fingers out of the way too, you’ll get blood blisters if you don’t.
Once you have the inner race and cage back on, it’s time to put your snap ring on too. Generally kits come with one. Either way, I squeeze the ring back together like so, to make it as tight as I can before putting it back on:

You basically just need it to touch again a couple times and you’re good. It shouldn’t be touching ends by itself though. Once you’ve done that, use your snap ring pliers to replace the snap ring on the little groove right in front of the inner race. After you’ve done this, you are ready to place your outer race onto the cage/inner race, making sure that the grooved line on the exterior of the outer race will be facing outwards, towards where the stub axle will be connected. A very important word about this: be sure you line up the wide sides with the narrow sides. If you look straight on at your joint put together, you will notice that the inner and outer races have alternating portions between where the ball bearings sit that are narrow and wide. The wide side on the outer race should line up with the narrow side on the inner race. If you to not make sure this happens, your CV will seize. If won’t even work while it’s in the vise on the workbench. Here’s a bad photo of that:

Now you are ready to reinsert the ball bearings. This is super fun. I am being sarcastic. But honestly sometimes it is, especially when you get to watch other people struggle with it. I start by adding the first three all the way around – one top, one side, one bottom. This is easiest. Then, you tilt the joint at opposite intervals and attempt to insert the ball and press the outer race back into proper place. This can take some cajoling and sometimes some plain force, especially if the axle has lower mileage (the T3 was AWFUL, the Booger and the Jetta are completely smooth and popped right in). Try not to get discouraged…installation is opposite of removal. If it went together before, it will go back together. You just have to have patience and be creative. Another helpful tip is to keep a box underneath your work area, as demonstrated in this photo:
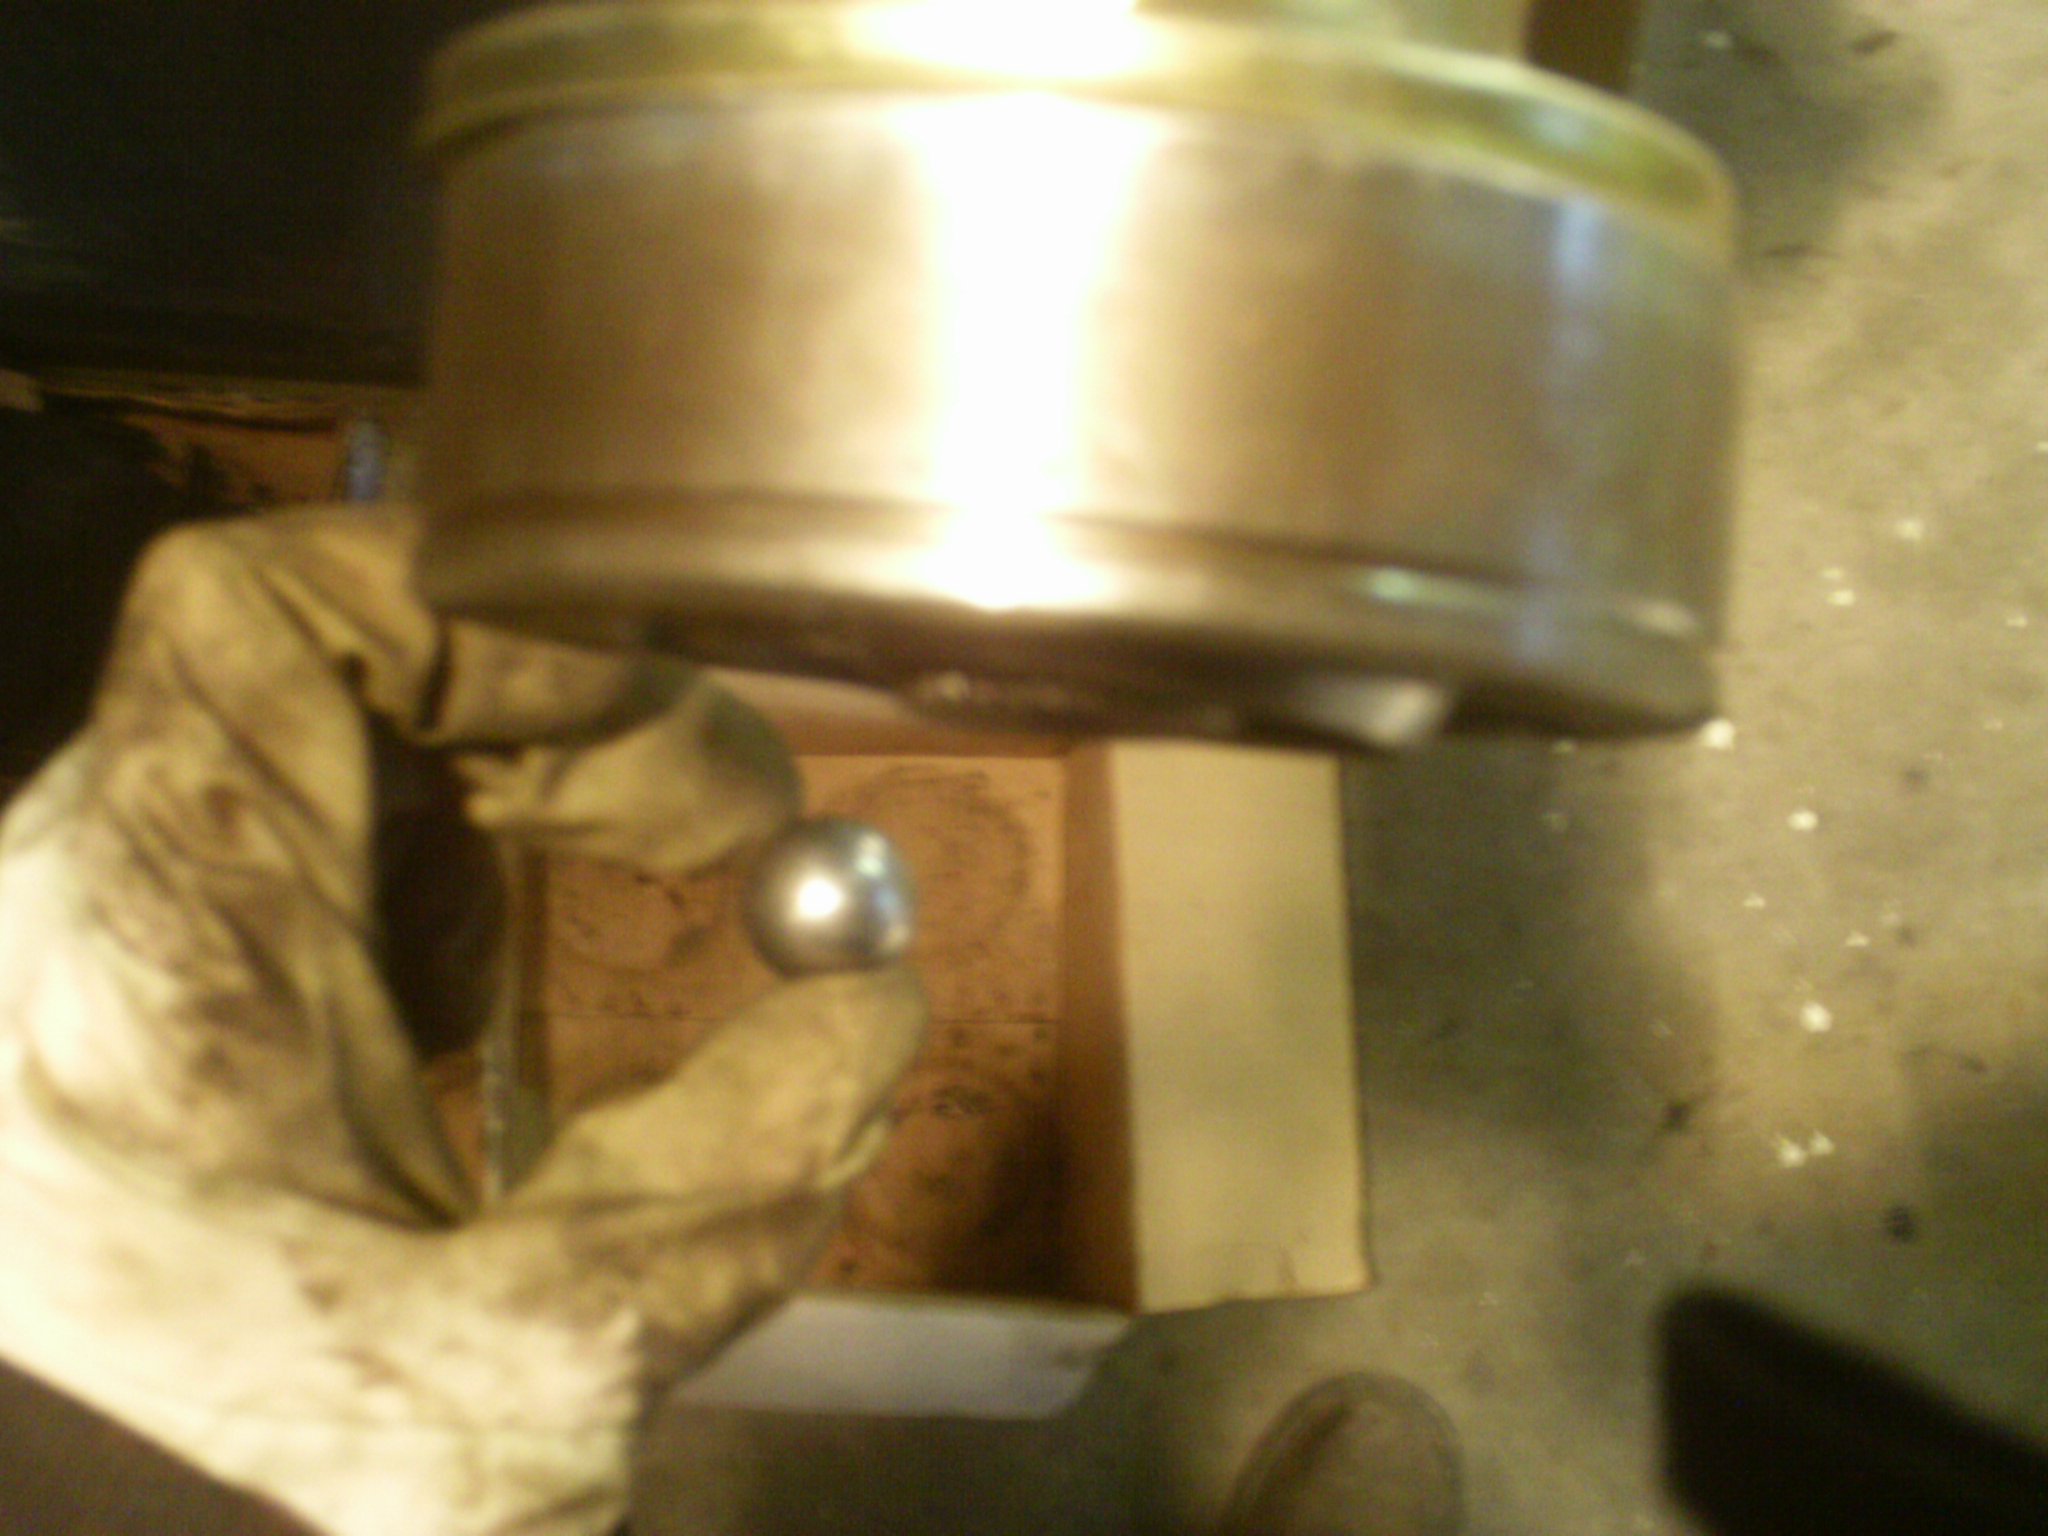
Do you see how this ball bearing will drop directly into the box? That’s a LOT better than chasing them across a cement floor and cleaning them again. They bounce in the box and you just pick them up again, wipe them off quickly, and go back to torturing yourself with the CV puzzle. Here is what it looks like as you are going along:

Once you finally have all the bearings in, it should look something like the following. Notice how the aforementioned alternating wide and narrow sections on the inner and outer race are lined up so that narrow is to wide, wide is to narrow?
Notice I stuck a bolt through the boot and outer race? That was so that it wouldn’t fall apart while I was still working on other things. I hadn’t greased this T3 joint up yet and did NOT want it falling back apart before I had a chance to finalize everything. That is your worse nightmare, especially when it’s been a fighter like the T3 was. So next you’ll need to get your grease together. Again, wear tight gloves, such as latex ones. Be sure to not get your finger trapped inside and a piece of your glove break off into the joint. CV grease eats up gloves pretty quickly. You’ll want to use a high velocity CV grease with graphite, and we prefer the Febi/Bilstein grease. Something German basically. Use a razor to cut a SMALL corner piece of the grease packet open – you want a small piece only so that you can force the grease where you need it to go (like in between the bearings), sort of like cake icing. Once you have done that, squeeze some grease into the boot itself and run your finger inside ALL portions of the boot, especially paying attention to the valleys or pockets/grooves of the boot. It’s important to be sure these are greased so they don’t fall apart under the high velocity and heat it will experience:

You will feel a drag and sort of texture if the boot has not been greased properly yet. It will feel slick if it has been greased all the way. Be sure to run your finger in all sections multiple times to be sure. I usually end up with about 1/4 of the grease packet used for this alone. From there, I squeeze a little bit more grease into the boot and spread that around as well. Then I turn to the joint and force grease into the bearing troughs and bearings all the way around. I use another 1/4 of the grease packet for this. I run my finger around to smooth it out, the move to the outside and work the joint around and around, back and forth. Keep an eye on your bearings, as the grease will start to work its way into the troughs and surround the bearings. The point of all of this it to be sure there are NO dry spots at any point on the bearings and races. This will cause pitting and eventually failure later. That clicking sound you sometimes hear with failing CV is often cause from pits that “catch” the bearing at a certain rotation and angle. You should be able to freely rotate your joint and push it back and forth without a hitch, but also be aware if you over rotate you will feel the “catch” too, which does not necessarily mean the joint is bad (especially if you’ve just inspected and rebuilt it). That is pretty obvious though.
At this point, you will want to move to the front and use another 1/4 of the packet on the front (stub axle side) of the CV. Repeat the process, forcing the grease among the bearings and rotating/pushing back and forth. You will use a bit of the remaining portion of the grease on your stub axle itself all around the inside, and the remaining portion of the grease on the inside and outside of the axle joint, with more of it going to the boot side of the joint. When you are finished, you will want something that looks like this:

A note about lock plates and washers…yes, you need those lock plates. There are three to a joint. Yes, you need those patterned little washers that go to your CV bolts, though the lock plates are more important. Each does its part to prevent the bolts from coming loose. We prefer the star patterned bolts as they are easier to maintain as opposed to the hex pattern bolts, and are less likely to strip out when they are torqued to 33 foot pounds (for a T1, T2, and T3) for both the stub axle and transmission sides.
And this is the end result:

It’s not necessary, but my personal preference is to rub Armorall all on the outside of the boot, and then wipe it down with a towel. It helps to protect the outer side of the rubber boot. If we aren’t going to install the axles directly on the car after rebuild, I use latex gloves to cover the end of the joint so that A. grease doesn’t get everywhere and B. nothing gets into the joint, thus ruining your hard work. Be sure to get the wrist part of the glove around all of the bolt heads so that it stays on properly. From there, store them somewhere safe and out of the sun. The grease will eventually eat those gloves up, so try to help them out by keeping them somewhere decent until you are able to install them.

That’s it! There may be better or quicker ways to rebuild a CV axle, but this works for us and hasn’t failed us yet. Happy building!
– TLR

